
Vanilla bean orchids (Vanilla planifolia) are not just beautiful tropical plants; they are also the source of one of the world’s most beloved spices—vanilla. Growing these orchids can be a rewarding but challenging endeavor due to their specific care requirements. Here’s a comprehensive guide to help you successfully plant and cultivate your own vanilla bean orchids.
Understanding Vanilla Bean Orchids
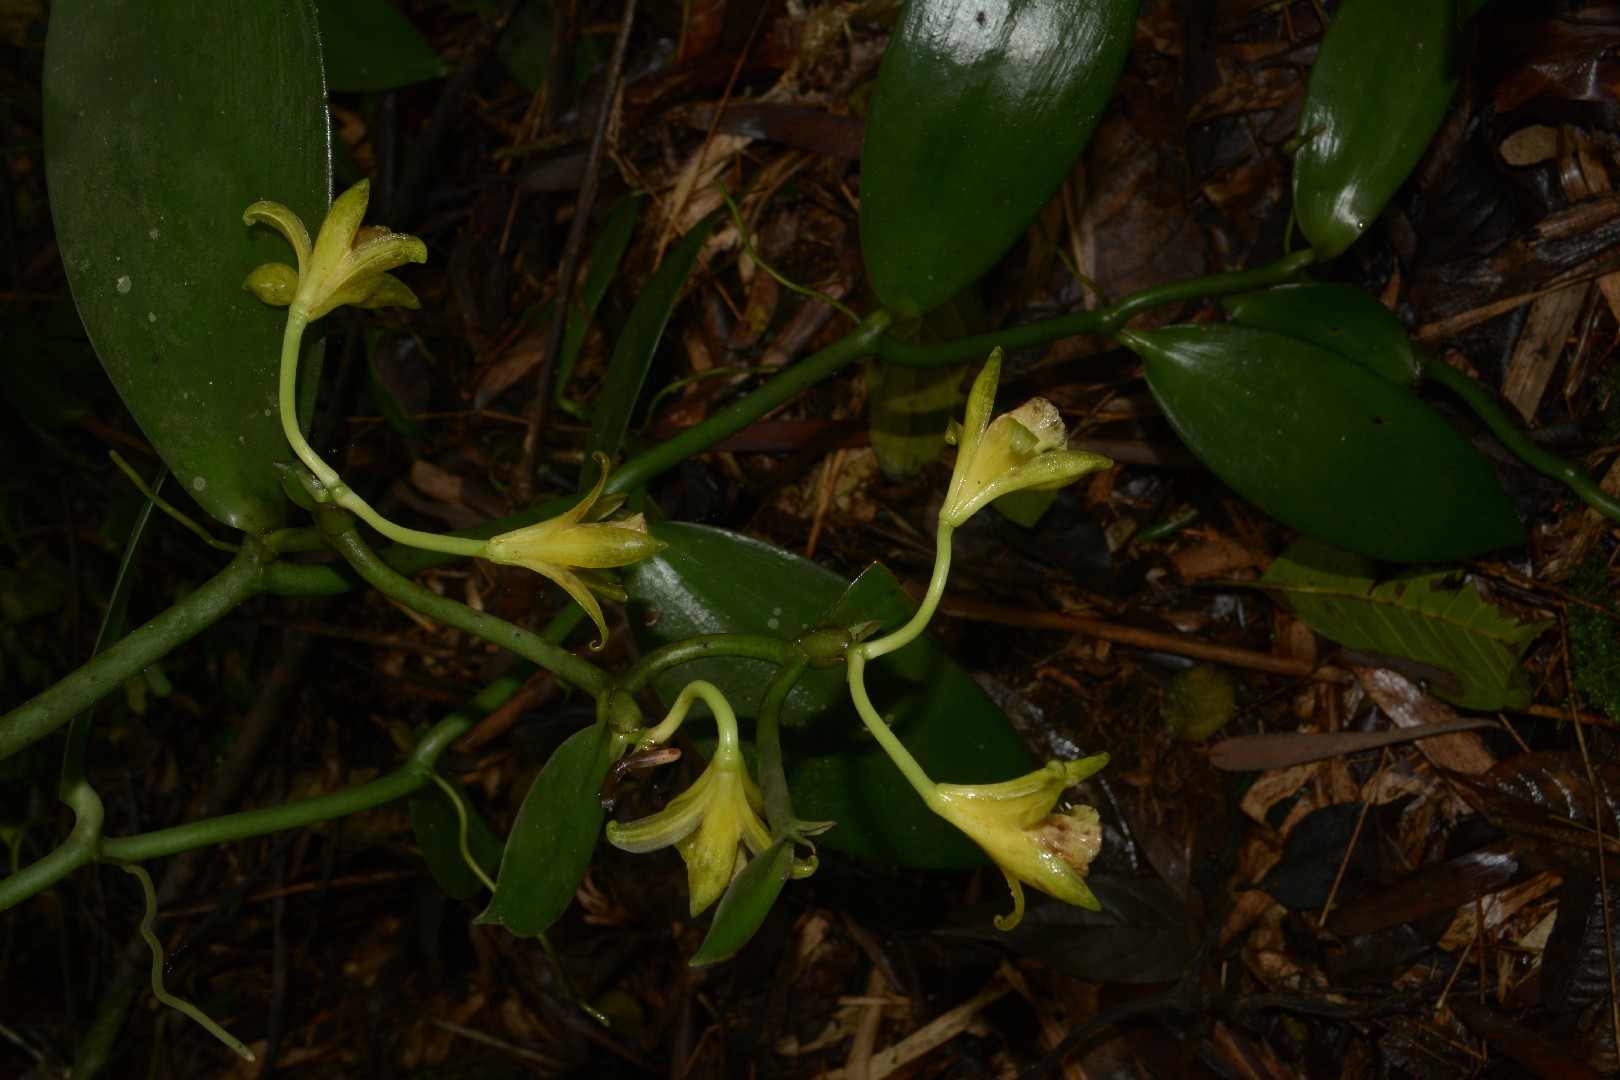
Vanilla bean orchids are tropical climbing vines native to Central and South America. They are unique among orchids because they produce vanilla pods, the source of natural vanilla flavoring. These orchids require a warm, humid environment, lots of indirect sunlight, and a structure to climb on. The vines can grow up to 30 feet long in the wild, and their flowers, which are pale greenish-yellow, bloom for only one day.

Step 1: Preparing the Right Environment
To grow vanilla bean orchids successfully, replicating their natural habitat is essential.
- Climate: Vanilla orchids thrive in warm, humid climates, ideally between 70-85°F (21-29°C) with humidity levels of 80% or higher. They are best suited for USDA hardiness zones 10-11 or grown indoors in greenhouses.
- Light: These orchids need bright, filtered light but should be protected from direct sunlight, which can scorch their leaves. A location with partial shade or dappled light is ideal.
- Support Structure: Since vanilla orchids are vines, they need a structure to climb on, such as a trellis, stake, or even a nearby tree.
Step 2: Planting the Vanilla Orchid
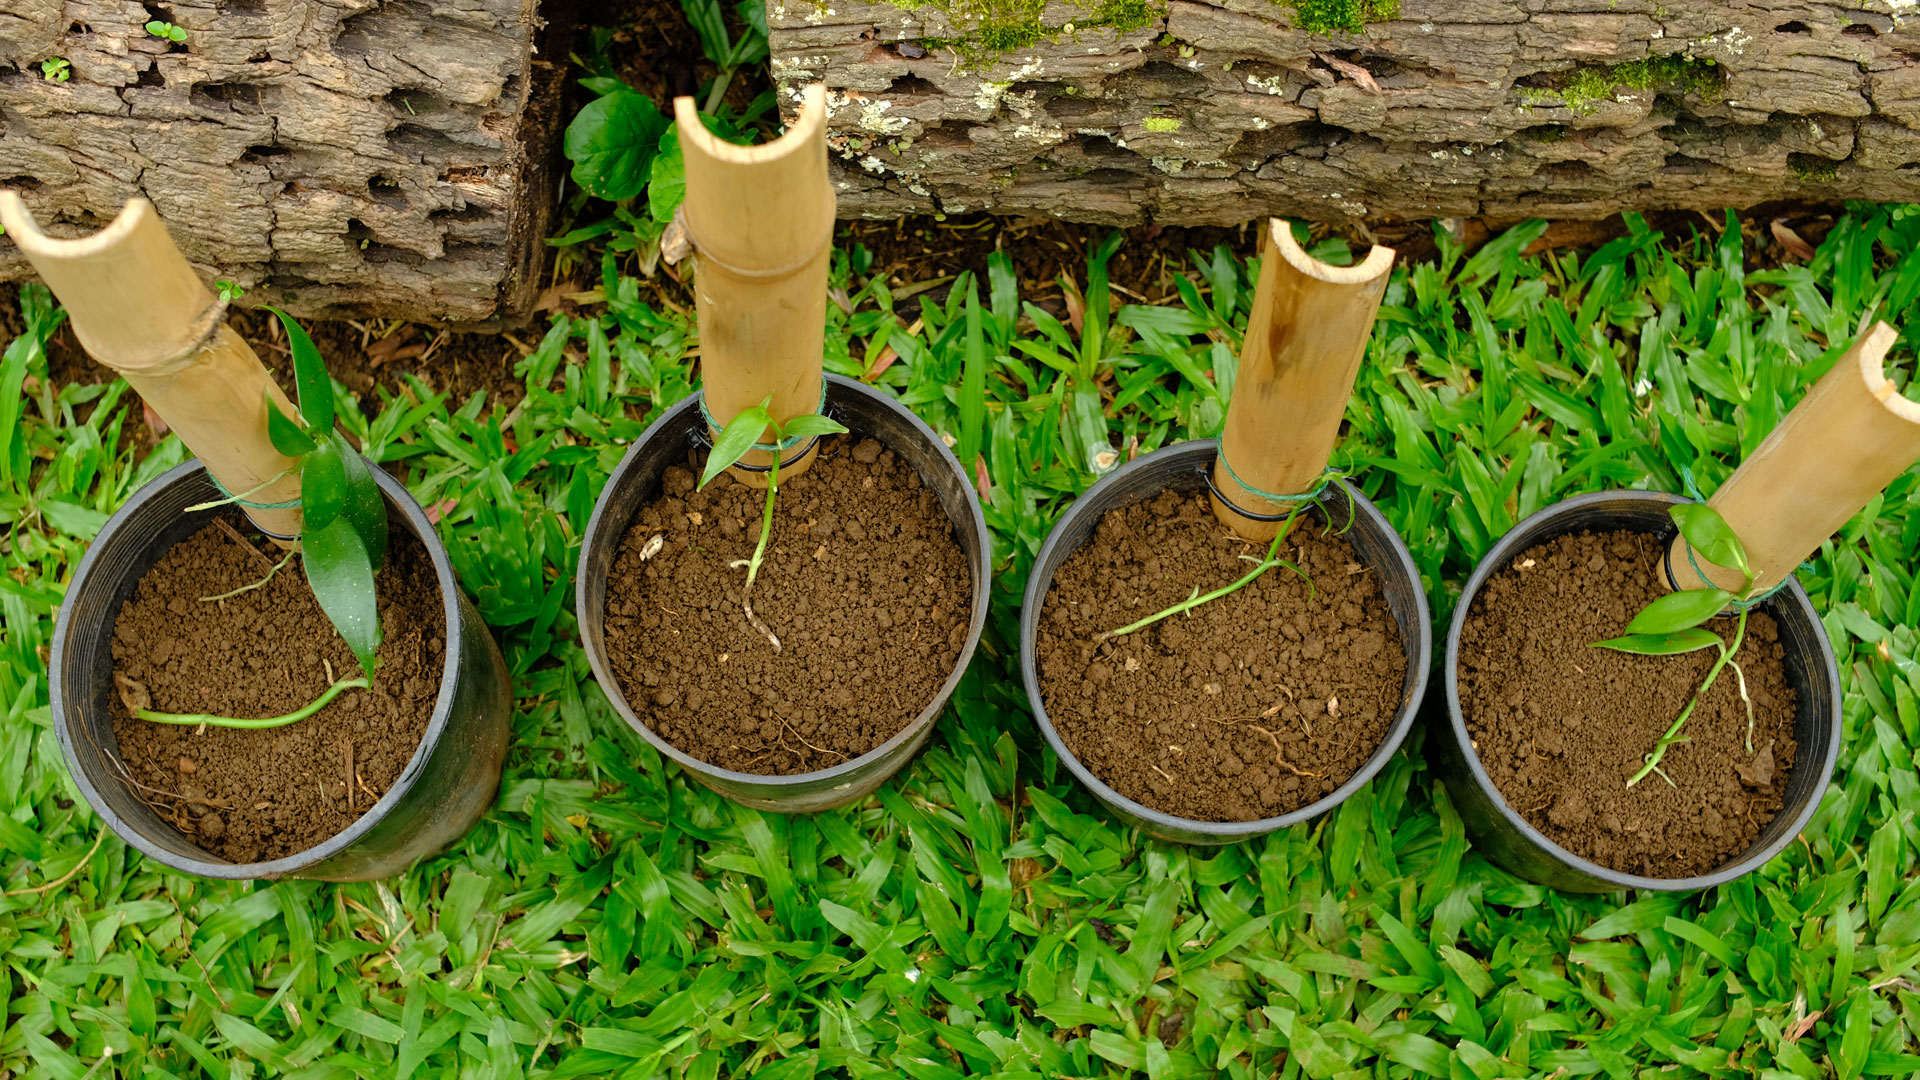
- Choosing the Plant: Start with a healthy vanilla orchid cutting or plant from a reputable nursery. Make sure the cutting is at least 12 inches long and has several nodes.
- Soil Requirements: Use a well-draining, loose potting mix suitable for orchids. A combination of orchid bark, sphagnum moss, and perlite works well. The medium should be able to retain some moisture without becoming waterlogged.
- Planting: Place the cutting in the potting mix, burying the lower nodes slightly under the soil. Ensure the vine is supported by a trellis or stake to encourage vertical growth. Water the plant lightly after planting.
Step 3: Watering and Fertilizing
- Watering: Keep the soil consistently moist but not soggy. Water the plant when the top layer of the growing medium feels slightly dry. Use room-temperature water and avoid waterlogging the roots, as this can lead to root rot.
- Humidity: Since vanilla orchids require high humidity, mist the plant regularly or use a humidity tray. Indoors, you might consider using a humidifier to maintain optimal conditions.
- Fertilizing: Feed your vanilla orchid with a balanced orchid fertilizer every two weeks during the growing season (spring and summer). During the dormant period (fall and winter), reduce feeding to once a month.
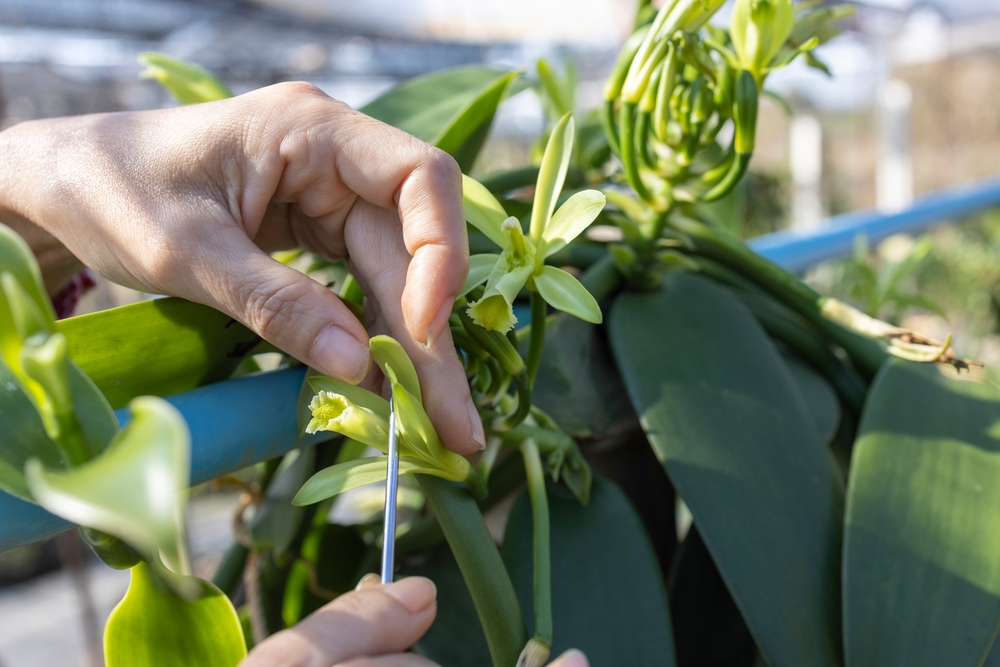
Step 4: Pollinating Vanilla Flowers
Vanilla orchids are unique in that their flowers need to be hand-pollinated, especially when grown outside their native habitat.
- Timing: Flowers bloom for only a day, so pollination must be done in the morning when the flower is fully open.
- Method: Use a small brush or toothpick to transfer pollen from the anther to the stigma of the flower. This delicate process is crucial if you want your plant to produce vanilla pods.
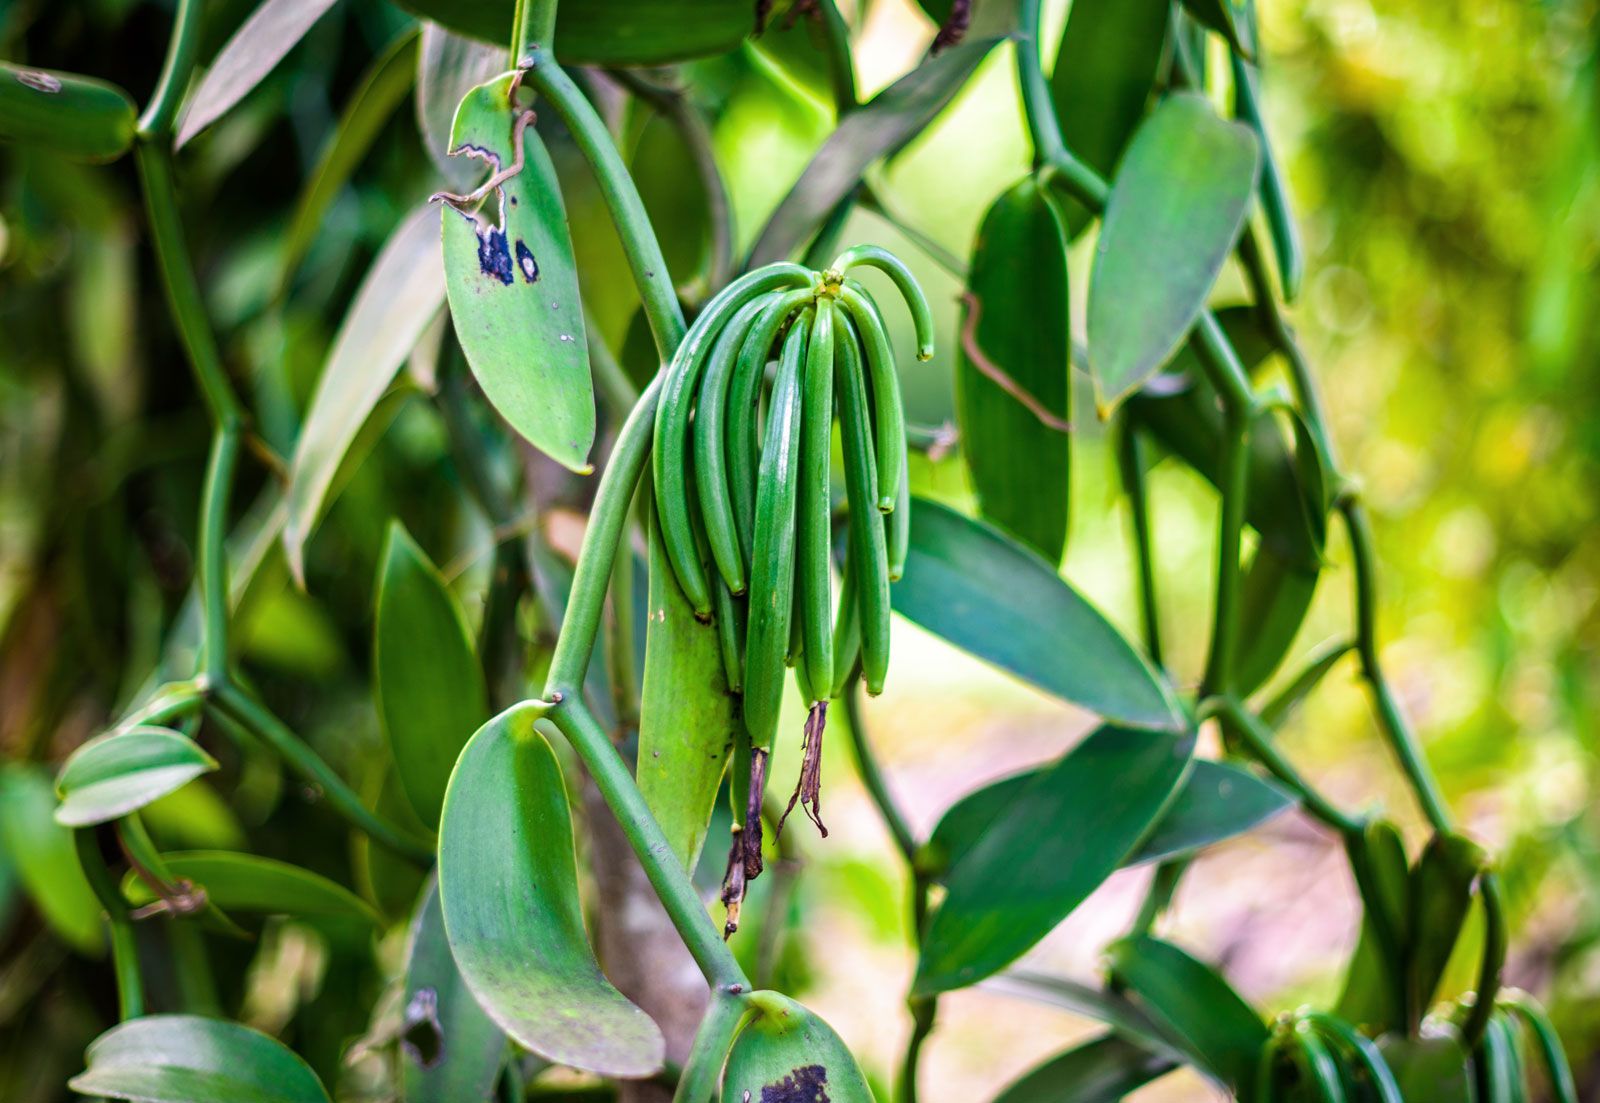
Step 5: Harvesting Vanilla Beans
Once pollinated, the flowers will develop into long, green pods over 6-9 months.
- Harvest Time: Vanilla beans are ready to harvest when they turn slightly yellow at the tip.
- Curing Process: After harvesting, beans need to be cured to develop their flavor. This process involves blanching, sweating, drying, and conditioning the beans over several months.
![fr]Madagascar Vanilla beans - curing process - MadaMarket Exporter[:]](https://artarch.dalatcamping.net/wp-content/uploads/2024/09/green_vanilla_pods.jpg.838x0_q80.jpg)
Common Challenges and Solutions
- Pests and Diseases: Watch out for pests like aphids, spider mites, and scale insects. Use organic insecticidal soap or neem oil for control. Root rot is another common issue, often caused by overwatering. Ensure your potting mix drains well and adjust watering practices if necessary.
- Growth Issues: If your orchid isn’t thriving, check light conditions, humidity levels, and ensure it’s receiving adequate nutrients. Poor growth often results from insufficient light or inadequate support for climbing.
Final Tips for Success
- Patience is Key: Vanilla orchids can take several years to flower and produce beans, so patience is essential.
- Proper Care Year-Round: Maintaining consistent temperature, light, and humidity will greatly influence the success of your vanilla plant.
Growing vanilla bean orchids is a long-term commitment, but the reward of harvesting your own vanilla pods makes the effort worthwhile. With the right conditions and a little care, you can enjoy the beauty of this unique orchid and the satisfaction of producing your own vanilla.